

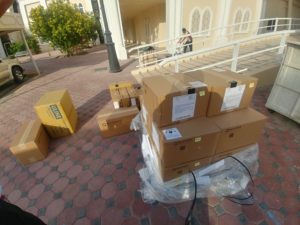
 So a few weeks after placing your order, your team received the shipment from Quanser with all the building blocks for your brand-new Autonomous Vehicles Research Studio. You are ready to fly your QDrones, but with all those boxes with the vehicles, cameras, and peripherals, you wonder where to start.
Your First Resource: Setup Guide
The research studio setup guide is meant to help streamline the process of turning the boxes on a skid to an actual functional lab. It walks you through all the steps and includes checkpoints so you can track your progress. Inevitably, you will run into some questions specific to your lab environment. From my experience helping our customers set up their labs, I can offer some additional tips that could help you and your team get ready as efficiently as possible.
Before you continue reading, I want to note that every lab is different. The room you have at your disposal is most likely completely different from the ones I’m about to use as examples. If, at any point during the setup process, you feel like doubt is creeping in, please contact Quanser customer support. It is always better to troubleshoot a potential problem early in the setup process. Once permanent installations have been made, it is harder to change them.
Flight Space Considerations
Okay, let’s get started. Normally, the first questions that come into mind are the location of the cameras with respect to the room, and how big the flight space should be. While this is mentioned on our website, I can give you a brief summary of what the flight space should be depending on the number of vehicles you intend to use.
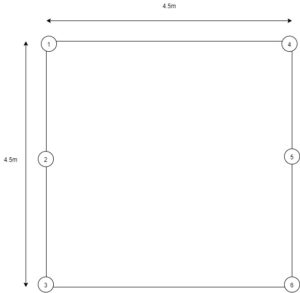
For a one to three vehicle solution, we recommend having a workspace the size of 4.5m x 4.5m x 2.5m. Please keep in mind that these dimensions are based on using the Flex 13 motion capture devices. Different camera models and types may require a smaller/bigger workspace, just remember only OptiTrack and Vicon cameras are supported by Quanser.
The stated volume results in an estimated camera capture space of 3.5m x 3.5m x 2m. What does this mean to you when you are setting up your workspace? It means that the corner cameras should be at a maximum distance of 4.5m horizontally or vertically. This is represented in Fig 1 as the distance between cameras 1 and 3 or cameras 1 and 4.
Now, does that mean your room needs to be exactly the stated size? No, and most rooms may not be. If your room is bigger than what we recommend, section off the flight space required for the number of vehicles you use. You can use the rest of the room for the control station. I would recommend you aim to have the flight space with the aspect ratio as close as possible to 1:1. This will benefit you greatly when it comes to having even tracking volume all around your workspace.
To be complete, the recommended room size for a four-vehicle lab is 6m x 6m x 2.5m, and for a 10-vehicle lab, the room should be 7m x 7m x 2.5m.
What Do Your Cameras See?
Great, you have secured your room and are now ready to get up and running! You mounted the cameras (check the setup guide!) and want to start flying right away, but not so fast… Having the correct room size is only one part of the puzzle, environmental factors come next.
The Flex 13s, which are the default motion capture cameras of the research studio, have IR LEDs. The cameras work together to localize the QDrone or QBot 2e for autonomous control. But what does this have to do with the environment? If the camera “sees” the QDrone, I should be okay, right? Well…. not exactly.
IR LEDs see the reflection coming from the markers, not the markers themselves. So when the QDrone is flying, the cameras don’t really know the difference between a reflection from the marker and a reflection caused by sunlight. All the cameras see are two reflections showing up in space.
If the QDrone happens to fly through an area of the lab exposed to direct sunlight, or with reflections from shiny surfaces such as walls or ceramic tiles, the cameras will lose the ability to track the individual marker, and lump the reflection and marker into one big marker… In other words, this is bad since it distorts the rigid body being captured and can result in a premature landing of the QDrone if the reflections are not taken care of early in the set up process. So prior to mounting the cameras, you want to remove as many reflective surfaces as possible.
No Shiny Stuff Here!
Here is an example of a room where almost all reflective surfaces have been covered. This, by the way, is the flight space at Wayne State University in Detroit. You can see the use of curtains to cover HVAC piping and shelves which could have been visible to the cameras.
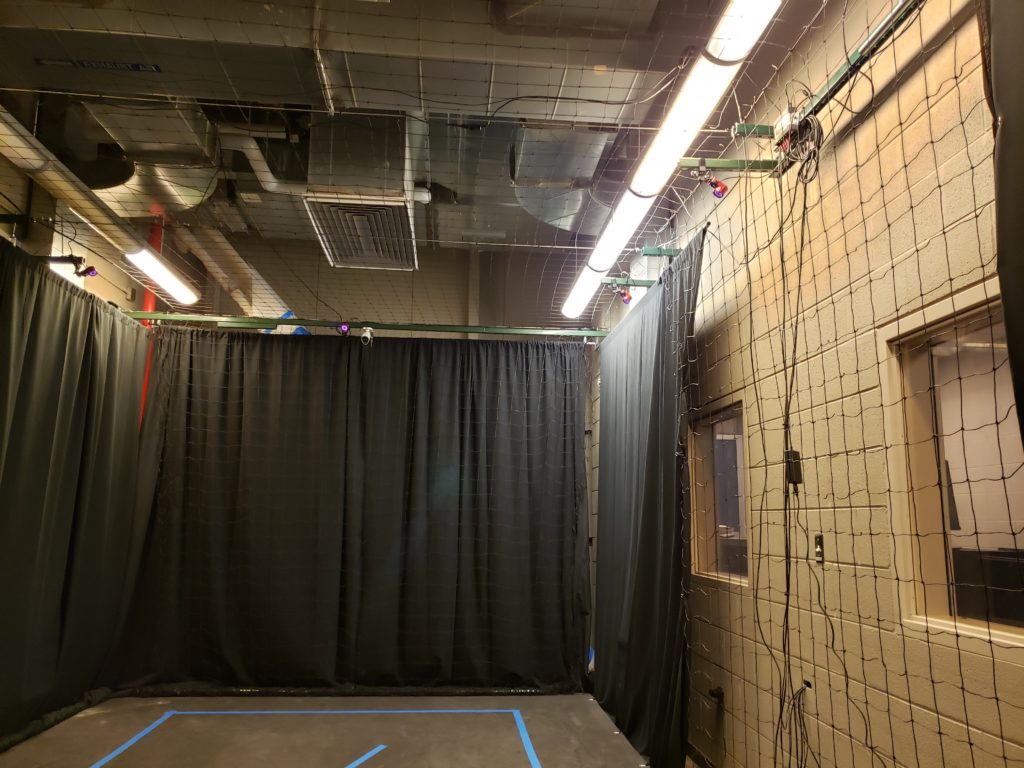
Black curtains are great for covering areas where there are few windows, and the reflective surfaces are very close to the cameras. But black curtains also heat up very easily… They would not be recommended if there was a window near your flight space. Due to the nature of the IR LEDs used in the Flex 13 cameras, the heat generated from sunlight onto the curtains can show up as a marker. This effect may not be noticeable until you have been working in the lab for a long while, and the heat accumulates.
What should you do then if you have a big window and a lot of natural light? You can try opaque white blinds that defuse as much light as possible. A great example of what that could look like is in the picture below.
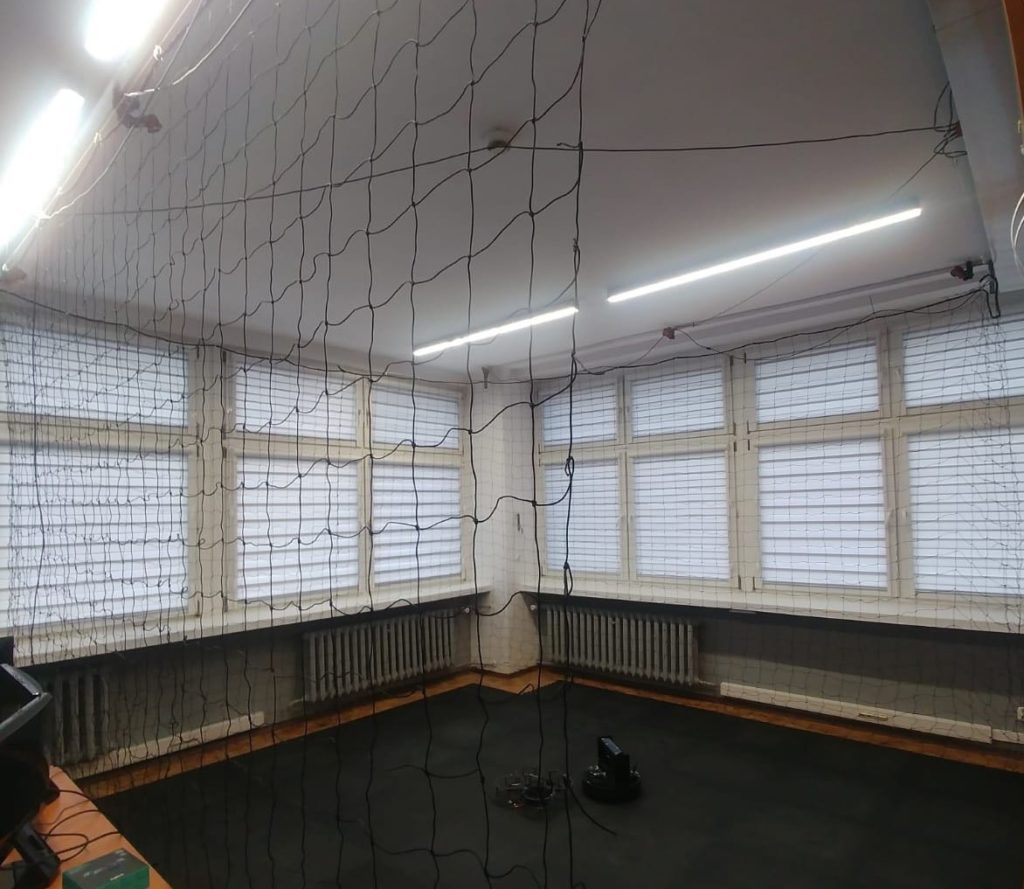
This is a lab at Politechnika Slaska, Poland. The blinds help defuse the natural light coming through the windows.
Apart from reflections from windows, you also want to make sure you covered reflective surfaces on the ground. The Autonomous Vehicles Research Studio comes with foam mats that help protect the QDrone from a heavy impact on landing (or crash-landing) but also double as matte surface reducing reflections. As always, these are just some suggestions. Feel free to experiment, and if you find a solution that works well in your lab, we would love to hear about it!
Keep your Vehicles and your Team Safe
Okay, you have the flight space with the cameras mounted, you covered reflections. And you are ready to start flying, correct? Not just yet. One other topic we need to discuss is safety.
Safety is imperative when operating a vehicle such as the QDrone. You will notice a net installed in both labs mentioned above. The netting is meant to double as a protection for both the QDrone, as well as the users working in close proximity to the QDrone. As a general safety practice, a protective net should always be in place around a workspace where you operate a device with propellers spinning in excess of 10000 RPMs.
Bad Vibrations
Great, so to economize, I can mount the netting, curtains, and the cameras all on one frame and save some time and money, right? Unfortunately, no. The highly accurate Flex 13s are great for motion capture. However, with great accuracy comes high sensitivity. These cameras shouldn’t be subjected to vibrations during regular operation. Even extremely small vibrations caused by moving the net when entering and leaving the workspace, or by a vehicle hitting the netting can have a huge impact on your work.
It is natural to be eager to enter the workspace after a successful test of your algorithm. But in the process, you just bumped into the netting and moved one of the cameras ever so slightly. During your next attempt to fly the QDrone, it becomes unstable or constantly loses tracking. But you haven’t changed anything! It is the small vibration you induced getting in and out of the workspace that caused the calibration to go bad. So you end up constantly re-calibrating the system, which, honestly, is a nuisance.
How can you mitigate this issue? Let’s start by making sure the cameras are mounted on a structure mechanically isolated from the netting and the curtains. It’s okay to use the same structure to support the net and the curtains since they don’t affect the regular operation of the lab. The cameras, however, are crucial to your everyday operation and any downtime is undesirable. If your room allows it, mount the cameras directly on the wall. We provide clamps that can support a beam up to 1.5” thick. Once the cameras are mounted to a structure separate from the curtains or netting support, you are ready to finish the setup of your Autonomous Vehicles Research Studio – and fly.
And remember – if you have any questions about your particular room and how the lab is configured, feel free to email our Customer Support. We will gladly assist you with your inquiry!